Tuesday, February 28, 2012

Game Spotlight: Farkle

I love games.  We have a lot of games.  A lot of games.  And there are still so many games I want!  We go in waves of playing and not playing them.  Right now we're in a not-playing-them period.  What a shame!  So, I think I need a little nudge to change the tide.  Here's my commitment: Each week I will pull out a game, put it out in our space & see what happens.  I'm starting with a new favorite of ours (which also made a fun & fantastic Valentine this year).


It's great for practicing: addition, regrouping, place value & probability.  (Which shouldn't deter "big kids" who already know how to do these things -- it's still a really fun family game!)  It's easy for family members of all sizes to "play" together (when you toss in some extra dice) -- and there are no gameboard & markers to fuss about who moves what, know what I mean?  The game length is easily adjustable.  We bought a packaged game, but if you already have six dice and a cup, this site has the rules.  It is so easy to learn and play.  It's been a really nice way to wrap up the day -- it's calm, uncomplicated, and we do it together happily (unlike the teeth-brushing that tends to come after...)

Tuesday, February 21, 2012

Breadmaker Night

Who doesn't love fresh-baked bread, right?  And sometimes, we have time for the whole (lovely) experience of making it from scratch.  But, often times -- we don't.  Never feeling satisfied with the "breadmaker bread" recipes I try, I decided I didn't have anything to lose by trying a homemade bread recipe we love -- in the breadmaker!  (This would be an example of the "Sure, let's try it," I mentioned a few posts ago.)  Guess what -- it turned out pretty well!  Well enough to keep making it that way.  In fact, we're waiting on the breadmaker right now.  (Imagine our fingers drumming, drumming, drumming in anticipation...)


sally lunn bread
3/4 cup milk
1/4 cup water
6 Tbsp butter
2 eggs, beaten
3 Tbsp sugar
3 cups flour
1 1/4 tsp salt
2 1/4 tsp breadmaker yeast

Heat milk & butter on the stove.  After the butter is melted, pour in cold water.  The mixture should be about 110 degrees, or, if you don't have a thermometer, like baby's bath water.  Think "Goldilocks" -- not too hot, not too cold.
Stir together sugar, flour, and salt in separate bowl.
Pour liquid mixture into breadmaker pan.
Add beaten eggs.
Pour in dry mixture, and make a well -- taking care not to uncover any of the liquid mixture below it.
Pour yeast into well.
Plug in breadmaker and follow the instructions specific to your machine.


According to Felicity's Cook Book, from which we adapted this recipe,
Some people say Sally Lunn bread came from the French phrase for sun-moon, soleil-lune (so-lay-LOON).  Each loaf has a golden top (sun) and white bottom (moon).  In English, soleil-lune became "Sally Lunn," which is how the bread is known today.
(Felicity is an American Girl character, growing up in colonial Virginia in 1774.  We've made many of the recipes from this cook book.  It's been a great way to study US history, and one of these days, I'll tell you all about it...)


And if you don't have a breadmaker -- or you just like to follow directions rather than make stuff up -- here's another way to do it.

Warm the milk over medium-low heat.  Measure the warm water and pour in small bowl.  Add 1 packet of yeast to the water and stir.  Stir in the warm milk.
 
Combine the sugar and softened butter in a large mixing bowl and stir until creamy.  Crack 1 egg into the bowl and beat.  Add the second egg and beat again.

Stir the flour and salt together in a medium bowl -- are you getting this?  Three bowls.  I love this bread, but seriously -- breadmaker.  Anyway, stir 1 cup of the flour mixture into the butter & sugar mixture (large bowl).  Then stir in about 1/3 of the yeast mixture (from the small bowl).  Add more flour and beat.  Add more yeast and beat.  Continue adding both, beating until smooth.  This is really good bread, and I've made it this way several times  -- it actually is worth it. 

Now your batter is done.  Cover it with a clean towel and let it rise in a warm place for an hour.  When it has doubled in size, remove the towel.  Stir the batter quickly to take out the air.  Grease a tube pan or round casserole dish.  Pour the batter into the pan, cover it with a towel, and let it rise for 30 minutes.  Preheat oven to 350o.  Remove towel and bake 40-45 minutes.

Wednesday, February 15, 2012

Two Rows at a Time


I'm on a crochet kick lately -- inspired by Sela and her friends who are learning.  I'm hoping this will eventually turn out to be a pair of hand-warmers.  I'm enjoying the feel of using a tiny crochet hook for the first time and having a project I can work on -- that's right, you guessed it -- 2 rows at a time.  My timing for this project is a little off, but with today's cold wind I felt some reassurance!  I had to snap this picture today, noticing that I had unintentionally put clothes on this morning that perfectly matched the yarn : )

(This is a great project for beginning crocheters.  It's just two rectangles -- check it out & give it a try!)

Sunday, February 12, 2012

Got Crayons?

We've had all these crayons since Sela was about 3 years old.  And this doesn't include the full boxes -- that we actually use.  I honestly can't remember buying a single crayon.  Where did these come from? 
This is how it is at our house.

Today we took out all the broken crayons.

We peeled off any remaining paper.


 We separated them by color, put them in Ziplock bags, and pounded them a little -- to get smaller pieces.
Because we have (meltable) heart-shaped ice cube trays and not metal pans in which we can bake & melt the wax, we dumped each color in a paper cup.  We *carefully* microwaved each cup -- one at a time.  In our small microwave, we started with 45 seconds, stirred with a popsicle stick, and added 15 second intervals and stirring until there was mostly liquid wax and a few small chunks.  Most often, it took only one additional setting of 15 seconds.  I wanted to be very careful not to scorch the cup... or worse.  (Now here's where I have to be totally honest.  I really make stuff up as I go along.  "Sure, let's try it," is something I say... pretty often.)

We poured each color into the molds. 
When they were completely cooled & hardened we popped them out.  We smoothed the sides by coloring with the edges a bit.


We put them into bags, stamped a little tag & used a colorful pipecleaner as a twist-tie -- perfect for little hands.

 Happy Valentine's Day!

Love's Sweet Glow

Several years ago, we gathered with friends and made these sweet candles.  (Now that I think about it, we made them in one friend's newly remodeled kitchen!  I was so nervous melting wax in there!)
We made them for Mother's Day, I think, but these two I pulled out today would have been very sweet as Valentine's Day gifts.


1.  Gather teacups & saucers from thrift stores (the back of your cupboards, your garage...)

2.  Tie wick (available at most all craft stores, or in my case, my garage) around a popsicle stick or skewer and dangle into cup so that it reaches the bottom.  The stick will lay across the top of the cup and hold it in place while the wax hardens.

3.  Melt beeswax in a pan/bowl double-boiler.  Use a thrift-store bowl because it will always be a "candle-making bowl" after this.

4.  Pour into cups & let them cool.

Thursday, February 9, 2012

Bits of Time, Bits of Yarn


Remember these?
Maybe a blanket?  Each granny square a different "flower" in the garden?  But that green is just 3 shades too...  much.


So, I took off the green...

& used it in center rounds,
finishing off in off-white. Much better.


But a blanket with holes?  Isn't that... ironic?

What are you working on right now?  I'd love to hear about it!

Saturday, February 4, 2012

Good Fortune


I love this book by Simonds, Swartz & The Children's Museum, Boston.  We borrowed it from the library, and discovered it's filled with stories, recipes, activities, and beautiful illustrations, covering
Chinese celebrations throughout the year.  This is one for our bookshelf.


Good Fortune

Friday, February 3, 2012

Gong Xi Fa Cai


I've read that on the fifteenth day of the first moon of the Lunar New Year, the celebration peaks with the Lantern Festival, celebrating the first full moon of the year and honoring the coming of spring.
This gave us a delightful reason to learn about geography and culture, create something fun and beautiful, and notice that we do, indeed, have some buds and blooms out in the garden!

To make festive lanterns, I bought a large sheet of beautiful handmade paper from the local art store.  Red construction paper would work just as well.  From our large sheet, I cut 4 rectangles that were 8 x 12 inches, as well as two smaller rectangles from the "scraps." 
(The one I'm working with here is one of the small rectangles.)

Start with a red rectangle.

Fold it in half so that you have a long, skinny rectangle.
Draw a guide line 1 inch from the open edge (the top in this photo).

Cut slits 1/2 inch apart on the FOLDED edge.
Do NOT cut all the way through the paper - stop at the pencil guide line you made.

Cut a piece of gold cardstock or paper just slightly smaller on three edges, but
about inch smaller along one long side.
Add double stick tape or glue dots along the
top and bottom edges of the gold paper.
Do not go all the way to the edges.  This will allow for easy layering and tucking when you fold it into a tube later.

Tape the gold and red sheets together so that each edge of the red paper matches up with both sides of the (smaller) gold sheet.
Be sure that you have turned the pencil-marked side of the red paper inward, toward the gold (to hide it).

Roll up edges to create a tube.
Tuck one end (both the gold and the red) between the gold and the red of the other end, overlapping two protruding 1/2 inch slits.
Staple at the top and bottom.
If it bulges a little in the center, you can reach in and stick a small piece of double-stick tape or glue dot to secure it.
Tape a handle on each side of the top (which was a scrap from our large sheet).


Now for the easiest tassles. Ever.
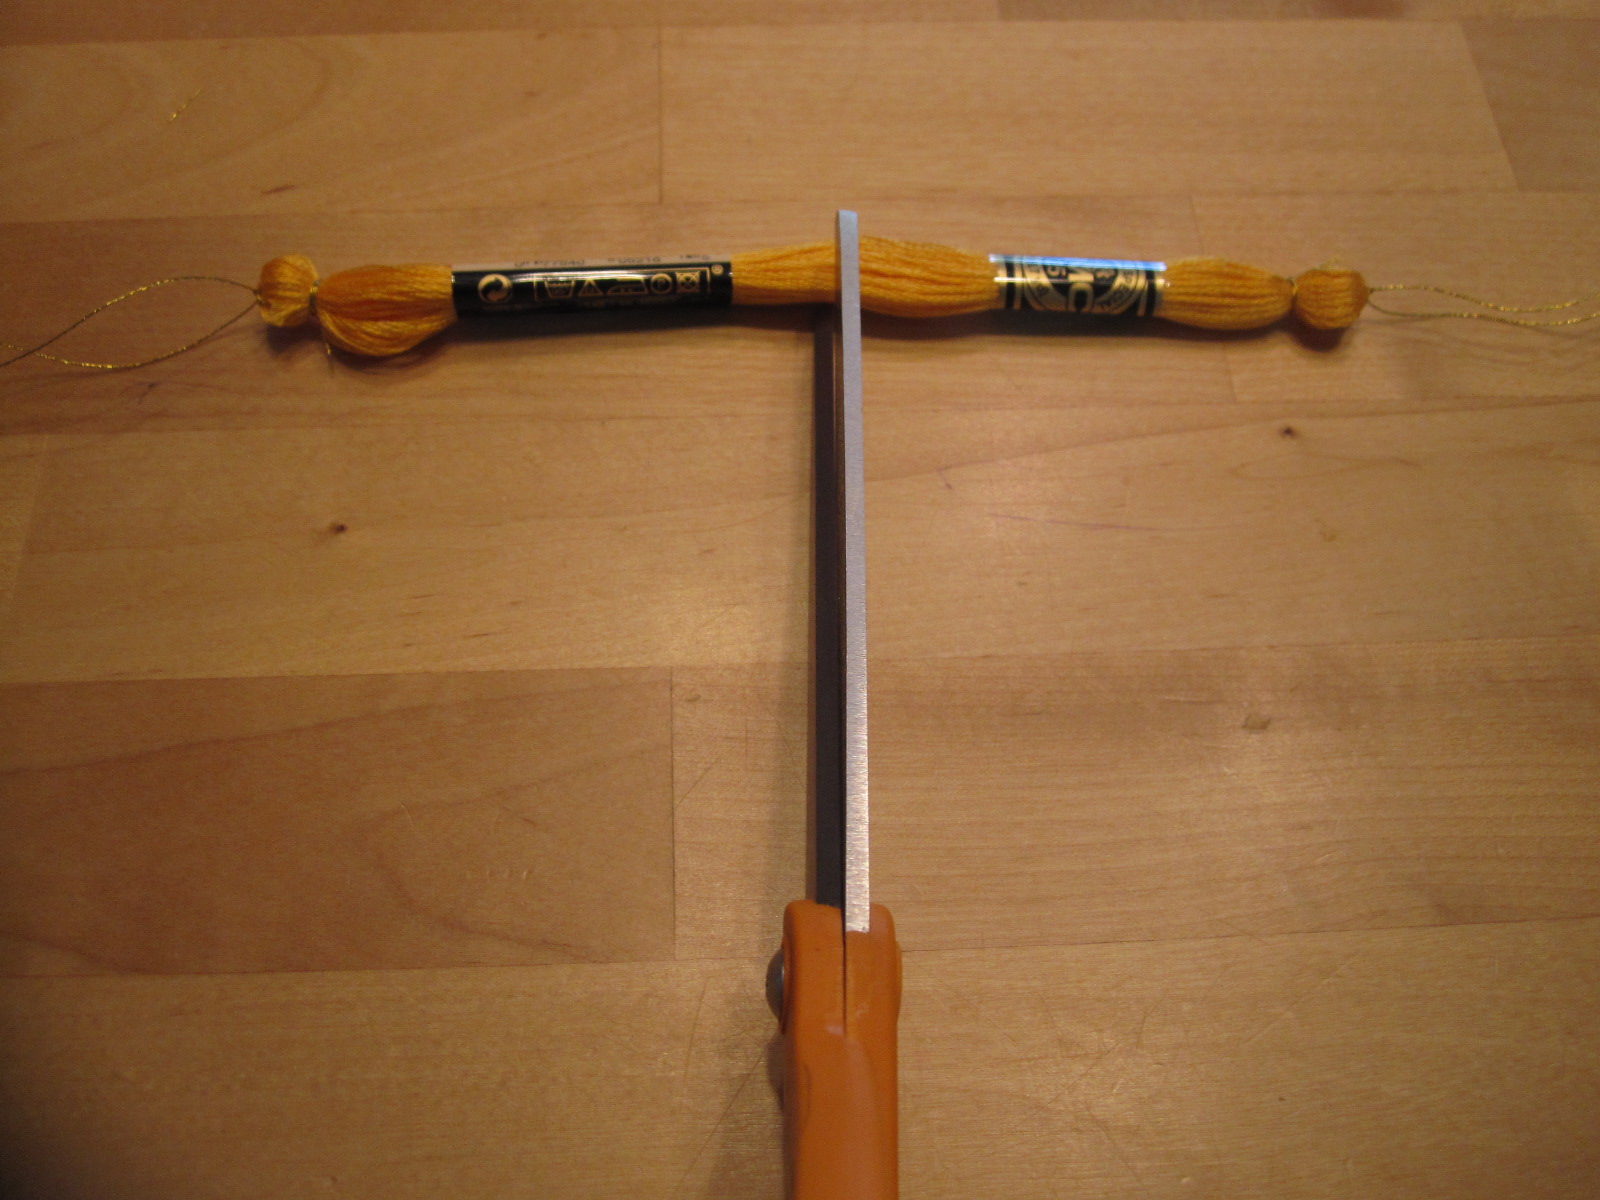
Thread a 12-inch piece of gold embroidery floss (or any color) through the loop end of a embroidery floss skein.  We used yellow and red.
Leave the wrappers on the skein.

Tie a knot, leaving the ends long so that you can attach it to your lantern.

Use another piece of gold floss to tie around the tassle.

Repeat process at other end of skein.
Then cut it in half.
Slide wrappers off bottoms of tassles.
Ta-da!!!  2 tassles.  So easy!  And Cute.

My idea had been to tie them at the top, from the handles.
Sela liked them from the bottom.  I do, too.
Next we'll get out our black paint and paintbrushes and write some nianhua (good luck characters) and chun lian (good wishes for the coming year)!