Showing posts with label craft. Show all posts

Saturday, December 31, 2016

2017: Nourish

Alongside the hustle and bustle of every day life, I will carry a word: nourish.
When I sit down with my calendar, I will consider this word: nourish.
Do more of what nourishes us, and do less of what does not.


Some of what has nourished me this week ( "2017 Pilot Project"):
A few much needed repairs,
little details that matter,
honing in on rabbit care that creates calm & peace,
noodling around with the sewing machine
& finally getting to some upcycling projects

Do you keep a word close to your heart throughout the year?  I'd love for you to share it in the comments.


Wednesday, October 14, 2015

The Harry Potter Project Continues

 When one of the kids wanted to "make t-shirts" I said, "What do you mean?  Make how?"  Oh!  You want to make things ON a t-shirt!  "Did you find some instructions?"

"No.  I just want to do it."

Got it.  I know just the person to go to -- Amy of Amy Hood Arts!  Her tutorial is terrific!  Quick trips to the supermarket for freezer paper, the craft store for fabric paint and X-acto knives, and we were on our way!

At twelve, the oldest kids could do every step by themselves.
At ten, just a little support with the cutting out.


At six, Linus designed it, I sketched (got the go-ahead) and cut, he ironed and painted.


This project is too good -- we took it on the road!

Tuesday, October 13, 2015

Harry Potter Summer: Group PBH*

Early in summer we planned to have a couple friends over.  THEY love Harry Potter.  WE love Harry Potter.  "Should we maybe do a couple Harry Potter crafts?" I asked their mom.  So, I pinned a few ideas and said, "Have your girls take a look and see if they like any of these."  Fine, good, they "like" a few, my kids and I go out on a Sunday evening and gather all the supplies (plus yarn in all the house colors -- just in case...)

Sunday night: kids go to sleep, I try to go to sleep but suddenly panic, "What if they don't really want to do the projects, and they were just being polite, and we are all TOTALLY PSYCHED here?!  Oh dear.  What have I set up?"  Fret, fret, fret.

Monday morning.  Our friends arrive.  I play it COOL.  One friend immediately asks Sela, "Do you have the Harry Potter station programmed into Pandora?"  The other friend is wearing her Harry Potter earrings.  We're GOOD.

What started out as "Harry Potter Week" became "Harry Potter Summer."  The kids (and I) took advantage of the time available and our shared interest and completely submerged into JK Rowling's magical world.  One project lead to another and another.  Many of the projects were so thoroughly explored that they lasted for days and sometimes weeks.  They worked together to decide what they wanted to do next.  They inspired each other and learned from each other.  They shared ideas and resources.  It was a true joy to watch and to be a part of.

They learned new skills and cultivated them through repeated practice.  I'm pretty sure they didn't see it this way -- they were just having fun.  The works they created stunned me.

tip of the iceberg

Two of the projects the group wanted to do involved lettering.  And when I realized I would need to be pretty involved in supporting Linus's choices, I noticed I was feeling pretty squirmy about it.  But, (of course), I set to work with him.  Between the canvas quotes and and village signs, I had to roll up my sleeves and get messy (figuratively speaking).  It was so interesting to notice just how anxious I felt at the thought of "lettering." (I mean -- people were going to SEE that I am not an expert.  My shabby work will be just *out there* for everyone to *see*.)  And then to work through it.  And then to discover it wasn't as difficult as I had made it out to be (for yeeeeeaaaarrrrrrs, apparently).  By digging in to the process, I learned so much about learning -- mine and the kids'.


I functioned as the word processor only - never underestimate kids' abilities


I didn't do the projects they did -- I was the support team for four industrious kids.  But, as I have a hard time getting to my bigger projects, I'm content to putter-craft while kids finish meals, when I need a creativity fix, and, you know, while we play Harry Potter word association at mealtimes.  While I already know how to cross-stitch and had stitched up a handful of HP projects ahead of time, I did learn to make (house-color) pom-poms, a house scarf bookmark on plastic canvas, and how to weave a pouch any Gryffindor would be proud to carry her Knuts, Sickles, and Galleons around in.

We shared our favorite parody videos - Dark Lord Funk and Before We Say Goodbye.  They shared this one with us.  They introduced us to Harry Potter Clue.

We're planning to reconvene for our Harry Potter Ornament Making meetings.  I can't wait.


*For more on Group Project-Based Homeschooling, go straight to the source!  Lori has a book, tip sheets, master classes, a blog, and a Facebook group.  She's a wealth of information, ideas, and support -- an invaluable resource, not just for homeschooling families, but for any family.


Thursday, January 1, 2015

File It Under: Where to Find This Next Winter

It's a good, good life.  It's a wonderful life.  It's also become a life where I'm generally two steps behind!  Ah well.  I can work with that, I suppose.  (I'm loaded with tricks.)

Our local art museum features a monthly Crafternoon for families.  It's exceedingly well done -- three craft projects that are interesting to do AND to have around the house afterwards, as well as being manageable for little ones and also engaging for adults.  It's very inexpensive, and, honestly, gathering the supplies for and executing three projects at home would cost more on my own (and I really love crafting with my kids!).  December's projects were beaded snowflakes, felt wreaths, and paper ornaments.  I had just a minute to learn to make the ornament, but I was so captivated by it that I made myself a tutorial for next year!

 Fold an origami square in half diagonally.

 Fold it in half again, forming a triangle.

 Hold the triangle so that the bottom edge could open.

 With the triangle closed flat,
make at least three cuts.
DO NOT cut all the way across.
Try to leave the same margin at edge for each cut.

 When you open your paper, 
it should look like this.

 Using double-stick tape,
roll in the innermost two flaps.
Because it's tiny, I use a pencil or the scissor tips
to help me make them stick together.

 Now, TURN IT OVER.
Repeat with the second set of flaps.

 TURN IT OVER AGAIN.
Repeat.

 Turn it over again. 
Repeat until all flaps are matched with corresponding flaps.

 Punch a hole & string it.
Beautiful for hanging in arrangements in windows.
Sela experimented with making more cuts.

 I experimented with making a star.
I cut two pieces of origami paper into 4 squares each.
(You need only 6 of the squares.)
I made 6 ornaments, 
and using double-stick tape at the bottom tips
put together two sets of 3.

With more double-stick tape,
I combined the two sets.

This one is small enough to hang 
with the Christmas cards or from the mantle.
Sela made one with regular origami paper
that is large and looks beautiful hanging in the window.
They have an wondrous way of feeling as though
they bring in light.
So lovely in these winter months!

(Happy Winter, You, and Merry Christmas 2015, Me!)

Monday, December 29, 2014

Crafting Together

This year we made rolled beeswax candles to give as gifts, and it might just be the most fun-to-make gift we've ever done.  It's not original.  It's not elaborate.  But, (and I hope our loved ones think so, too) I think they are a classic beauty.  The icing on the cake was how lovely and truly relaxing it was to make them together.  I'll go back to this project again and again.  (And also, back to the bee keeping supply store where we bought the sheets of beeswax.  We have our eye on supplies to make lip balms next time.  And molded candles after that.  And then we'll see what else strikes our fancy!)

Linus will demonstrate the process, in the spirit of a remarkably family-friendly project.

 We opted for two tapers per sheet, 
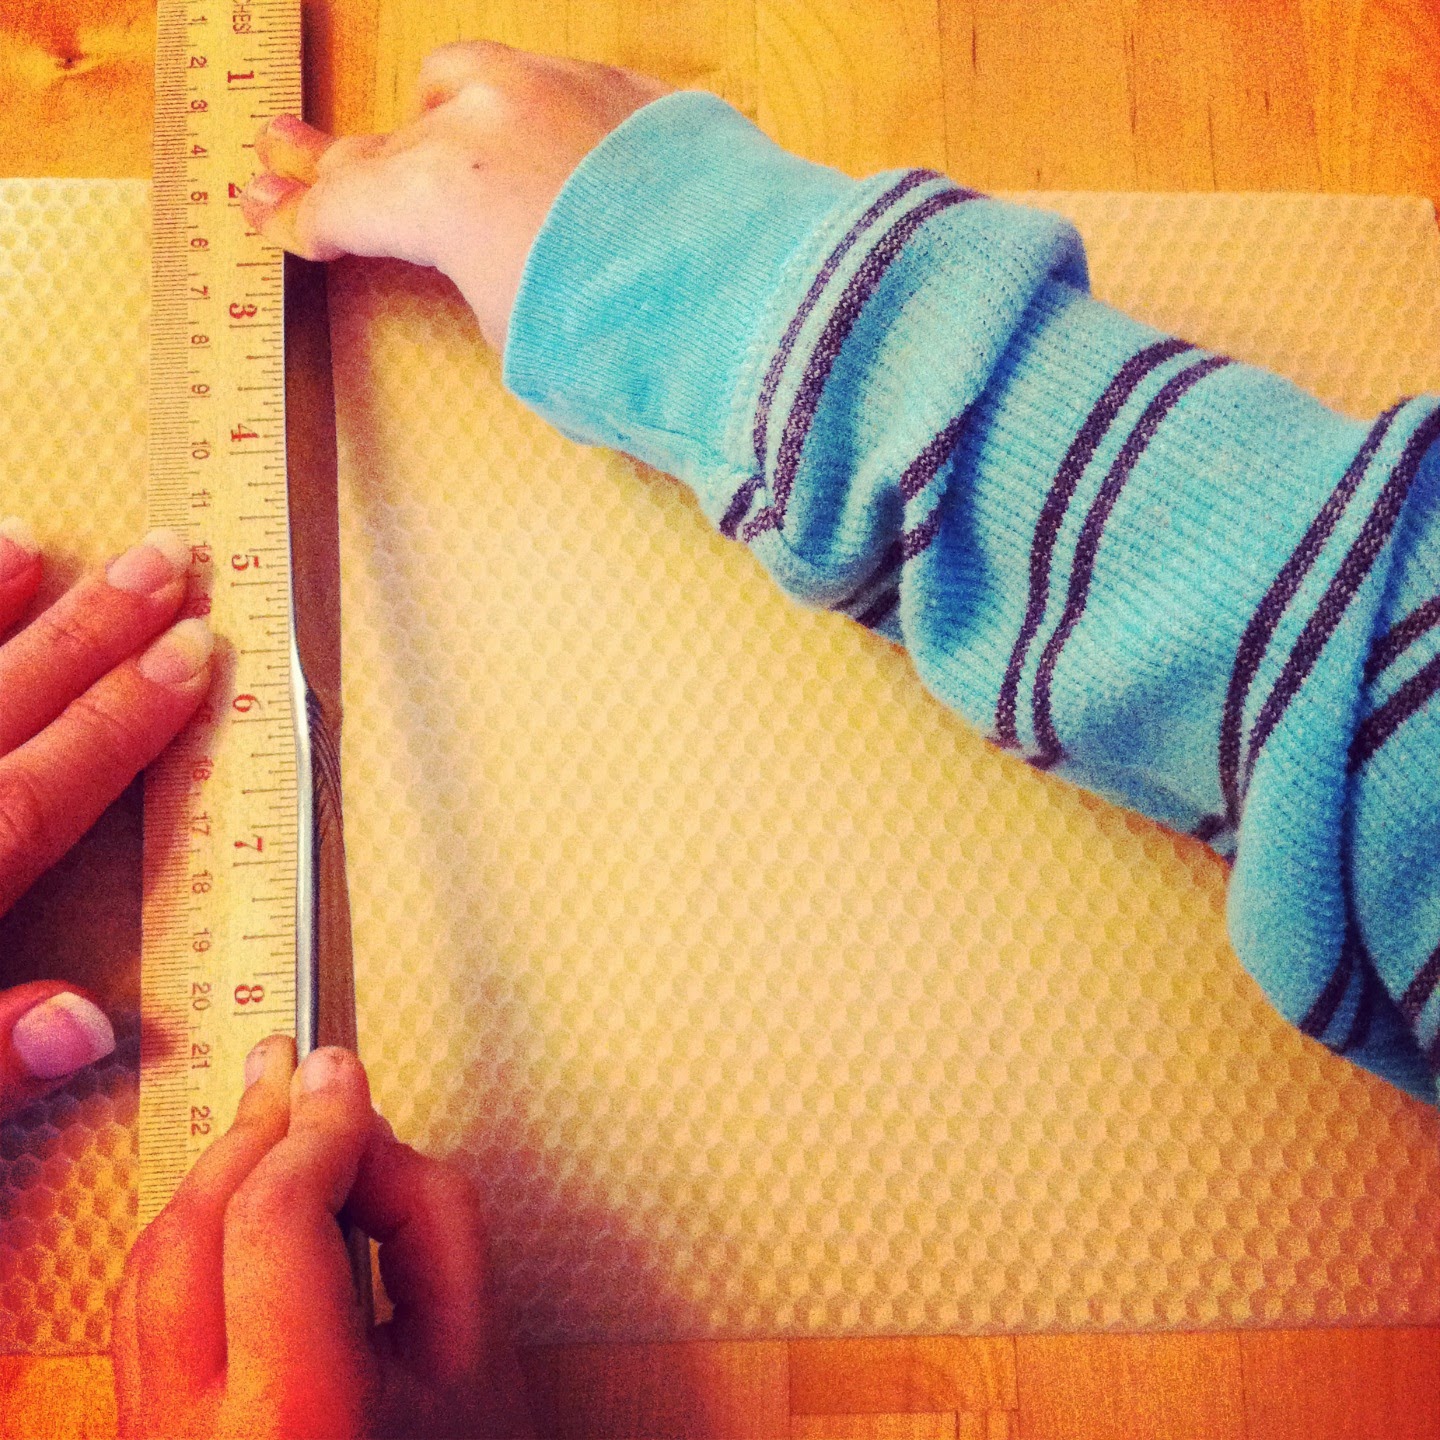
so we measured it and found the halfway point,
scoring with a butter knife at the top and bottom edges.


 Using our marks at the top and bottom,
we used a straight edge to score a complete line.
No need to saw, just press it into the wax.
Then, pick up the wax sheet and bend it.
It will break into two pieces.


 Lay the wick along the edge and trim to size.


 Press the wick along the edge to keep it in place.
Curl up the edge so that it covers the wick.
Then, roll, roll, roll.


 Press the seam from top to bottom to seal it.


I just love them!  Thanks, Linus <3

Sunday, December 22, 2013

Sunday, December 1, 2013

Sometimes you need a little something...


Looking for a simple, cute & functional craft activity?
How about these wreath napkin rings?  They make cute package toppers and tree decorations, too.
Sometimes we need something for a mixed group -- kids who love crafts, kids who don't always but are in for something simple, big kids, little kids, adults.  Easy to make a few or a bunch.  Great for a gathering.

Here's what you need:
pipe cleaners
green tri beads
red round beads
ribbon
scissors

Cut pipe cleaner to size, slide beads on, twist ends to form a circle, tie on bow!


Tuesday, November 12, 2013

Give & Take

Today Linus and I made our first superhero.  He picked Batman.  He's a little disappointed it isn't made out of plastic, but I told him I do not want to have a factory in order to make a plastic one; we will use what we have.  He said it's "mostly great."  I will take that.


Tuesday, September 17, 2013

Tiny Toys to Make & Use

Fairy gardens (and trucks, and doll houses, and race cars, and dinosaurs) need people.  We made these three summers ago from acrylic paints and wooden pegs we bought at Michael's.  I'm happy to see that they've resurfaced -- they're lots of fun!  

The guy on the left was lovingly named Oliver by one-year-old Linus.  Come to think of it, everything was named Oliver that year!

 The trick is to use a toothpick to paint thin lines and small hearts & flowers.

What else have we transformed for dollhouses and gardens with a little paint?  Drawer pulls have become toadstools.  Wooden plugs (screw hole buttons) have become tiny cupcakes and tiny toadstools.

It's getting to be that time of year when we spend more time indoors.  These are the bitty treasures that show up in lots of our fall and winter activities.  Fun for play, but also for storytelling, drawing, math.  And they're great in a "take along pouch" -- where I toss in a handful of surprises to play with while waiting.  Because there is always some waiting.


Thursday, September 12, 2013

Need to Get Away?


Made by friends, this beautiful origami ornament inspired us to share it with our book club.  We fancied it looked like a whimsical hot air balloon, transporting us over oceans and continents, just as it did Professor William Waterman Sherman and his fellow Krakatoans in The Twenty-One Balloons.


 Follow the simple directions for a waterbomb base.
Then complete your balloon.
(This site has clear and easy directions for so many kid friendly projects.)


 Thread your needle with embroidery floss.  
Be sure the eye of the needle will pass through the beads you'll be using.
Tie a bell onto the end of the floss (where you would normally knot it).


 String beads.


   Add your balloon by inserting the needle through the blowing hole 
and pushing it through to the other side.


  String more beads.


Tie it off by creating a loop, for hanging.


Bon Voyage!


Thursday, June 13, 2013

Story Lights


I love the rhythm of summer -- the predictability of the weather and of little that must be done.  And of easing into summer nights.  Play falls into dinnertime.  And then children spill back into more play -- but changed with full tummies, family chatter, and the setting sun.  The glow of candles in the house meets the setting of the sun outside.  Dinosaurs and trucks find a place to rest, book stacks materialize, and "pioneer children" ("farm children," "kids riding on a train across the country to see their aunt") gradually settle.

Because of this natural evening ritual, we have a lot of homemade candle holders.  We made these with large applesauce jars, Mod Podge, and tissue paper. (Thanks, Mama Scout, for the inspiration!)  Sela wrote a short story, typed it up, and printed it out.  Linus dictated his story to me and went to the desk for the "fancy" scissors to cut it out.  To change it up a bit, I stuffed an errant strand of Christmas tree lights into the jars.

'Night all.

Wednesday, February 20, 2013

Bodie the Snake Eats a Chinese Buffet

The title says it all, really.

Lucky for us, Chinese New year is traditionally celebrated for 15 days.  The Crocker gave us a chance to enjoy crafting for the occasion.  We all enjoyed ourselves making these clever and surprisingly simple projects.  And from supplies that you might already have on hand.  How can you go wrong?

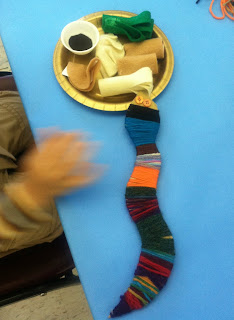
Bodie the Snake (Linus's take on the year's black water snake) was made by wrapping yarn around a cardboard template and adding button eyes.  I thought a tongue would be cute, but he told me that his snake "doesn't feel like having his tongue hanging out."  Well, sure.  When you say it that way.

Both kids played with these homemade toys for days.  AND, they made up stories about them.  Anyone need writing inspiration??
Notice the pipe cleaner inside the potsticker-
much easier than a wire & ribbon

Sela whipped out all of this felt food while Linus and I made a snake!  That's broccoli, cauliflower, a potsticker, an eggroll, soy sauce, and a fortune cookie.  With a fortune!

We took our treasures home and played, played, played.  The kids made a town with two Chinese restaurants, a candy shop, and a bakery.  Felt food is fun.

We finished the night by the glow of our Chinese lanterns (complete with battery-operated tea lights).  Those are Mason jars, Mod Podge, red and gold tissue paper, gold pipecleaners, gold Glitter Eyelash Yarn, and gold string.

Thank you, Crocker, for another GREAT family outing!

Tuesday, February 5, 2013

The Do-able Valentine Party

Sela has always wanted a Valentine's Day Party.  I think she's asked every year since she was three years old.  Now, you know I'm a Yes-Man, and I still always end up having to say No.  How to pull this off has eluded me for years.

Until now.  Thanks to the inspiration of a friend, we hosted a Valentine Making Party.  It was perfect!

We picked a day that was convenient (not being on February 14th didn't detract from the celebration in this case!  Major hurdle... hurdled!)  We loaded the table with craft supplies we had on hand, invited a couple friends (who brought supplies they had), added scissors & a multitude of adhesive products, and turned them loose.  No researched projects, no samples, (virtually no prep at all) -- just good ol' creative crafting by kids.  (Not to mention some really inspired play-on-word Valentine slogans.)

We wrapped it up by cutting, sprinkling & eating cookies.

I snapped a picture of our guests that we'll send them as a Valentine.

And our kids' Valentines are made & ready!

I love Yes.