Showing posts with label winter. Show all posts

Wednesday, January 11, 2017

{celebrating dailiness} wintry potpourri


Nestled in on a cold wintry day.  Bunnies snooze.  The heater hums.  And wintry potpourri simmers on the stovetop.

few orange slices (best citrus for the job -- I tried lemon, lime & grapefruit as well)
cinnamon stick
whole cloves (doesn't take many)
fresh cranberries


Also makes a nice little gift for a friend, if you include a whole orange along with the other ingredients, in a clear little bag & tied up with a bit of baker's twine!

Happy Wednesday!

Thursday, January 1, 2015

File It Under: Where to Find This Next Winter

It's a good, good life.  It's a wonderful life.  It's also become a life where I'm generally two steps behind!  Ah well.  I can work with that, I suppose.  (I'm loaded with tricks.)

Our local art museum features a monthly Crafternoon for families.  It's exceedingly well done -- three craft projects that are interesting to do AND to have around the house afterwards, as well as being manageable for little ones and also engaging for adults.  It's very inexpensive, and, honestly, gathering the supplies for and executing three projects at home would cost more on my own (and I really love crafting with my kids!).  December's projects were beaded snowflakes, felt wreaths, and paper ornaments.  I had just a minute to learn to make the ornament, but I was so captivated by it that I made myself a tutorial for next year!

 Fold an origami square in half diagonally.

 Fold it in half again, forming a triangle.

 Hold the triangle so that the bottom edge could open.

 With the triangle closed flat,
make at least three cuts.
DO NOT cut all the way across.
Try to leave the same margin at edge for each cut.

 When you open your paper, 
it should look like this.

 Using double-stick tape,
roll in the innermost two flaps.
Because it's tiny, I use a pencil or the scissor tips
to help me make them stick together.

 Now, TURN IT OVER.
Repeat with the second set of flaps.

 TURN IT OVER AGAIN.
Repeat.

 Turn it over again. 
Repeat until all flaps are matched with corresponding flaps.

 Punch a hole & string it.
Beautiful for hanging in arrangements in windows.
Sela experimented with making more cuts.

 I experimented with making a star.
I cut two pieces of origami paper into 4 squares each.
(You need only 6 of the squares.)
I made 6 ornaments, 
and using double-stick tape at the bottom tips
put together two sets of 3.

With more double-stick tape,
I combined the two sets.

This one is small enough to hang 
with the Christmas cards or from the mantle.
Sela made one with regular origami paper
that is large and looks beautiful hanging in the window.
They have an wondrous way of feeling as though
they bring in light.
So lovely in these winter months!

(Happy Winter, You, and Merry Christmas 2015, Me!)

Monday, December 29, 2014

Crafting Together

This year we made rolled beeswax candles to give as gifts, and it might just be the most fun-to-make gift we've ever done.  It's not original.  It's not elaborate.  But, (and I hope our loved ones think so, too) I think they are a classic beauty.  The icing on the cake was how lovely and truly relaxing it was to make them together.  I'll go back to this project again and again.  (And also, back to the bee keeping supply store where we bought the sheets of beeswax.  We have our eye on supplies to make lip balms next time.  And molded candles after that.  And then we'll see what else strikes our fancy!)

Linus will demonstrate the process, in the spirit of a remarkably family-friendly project.

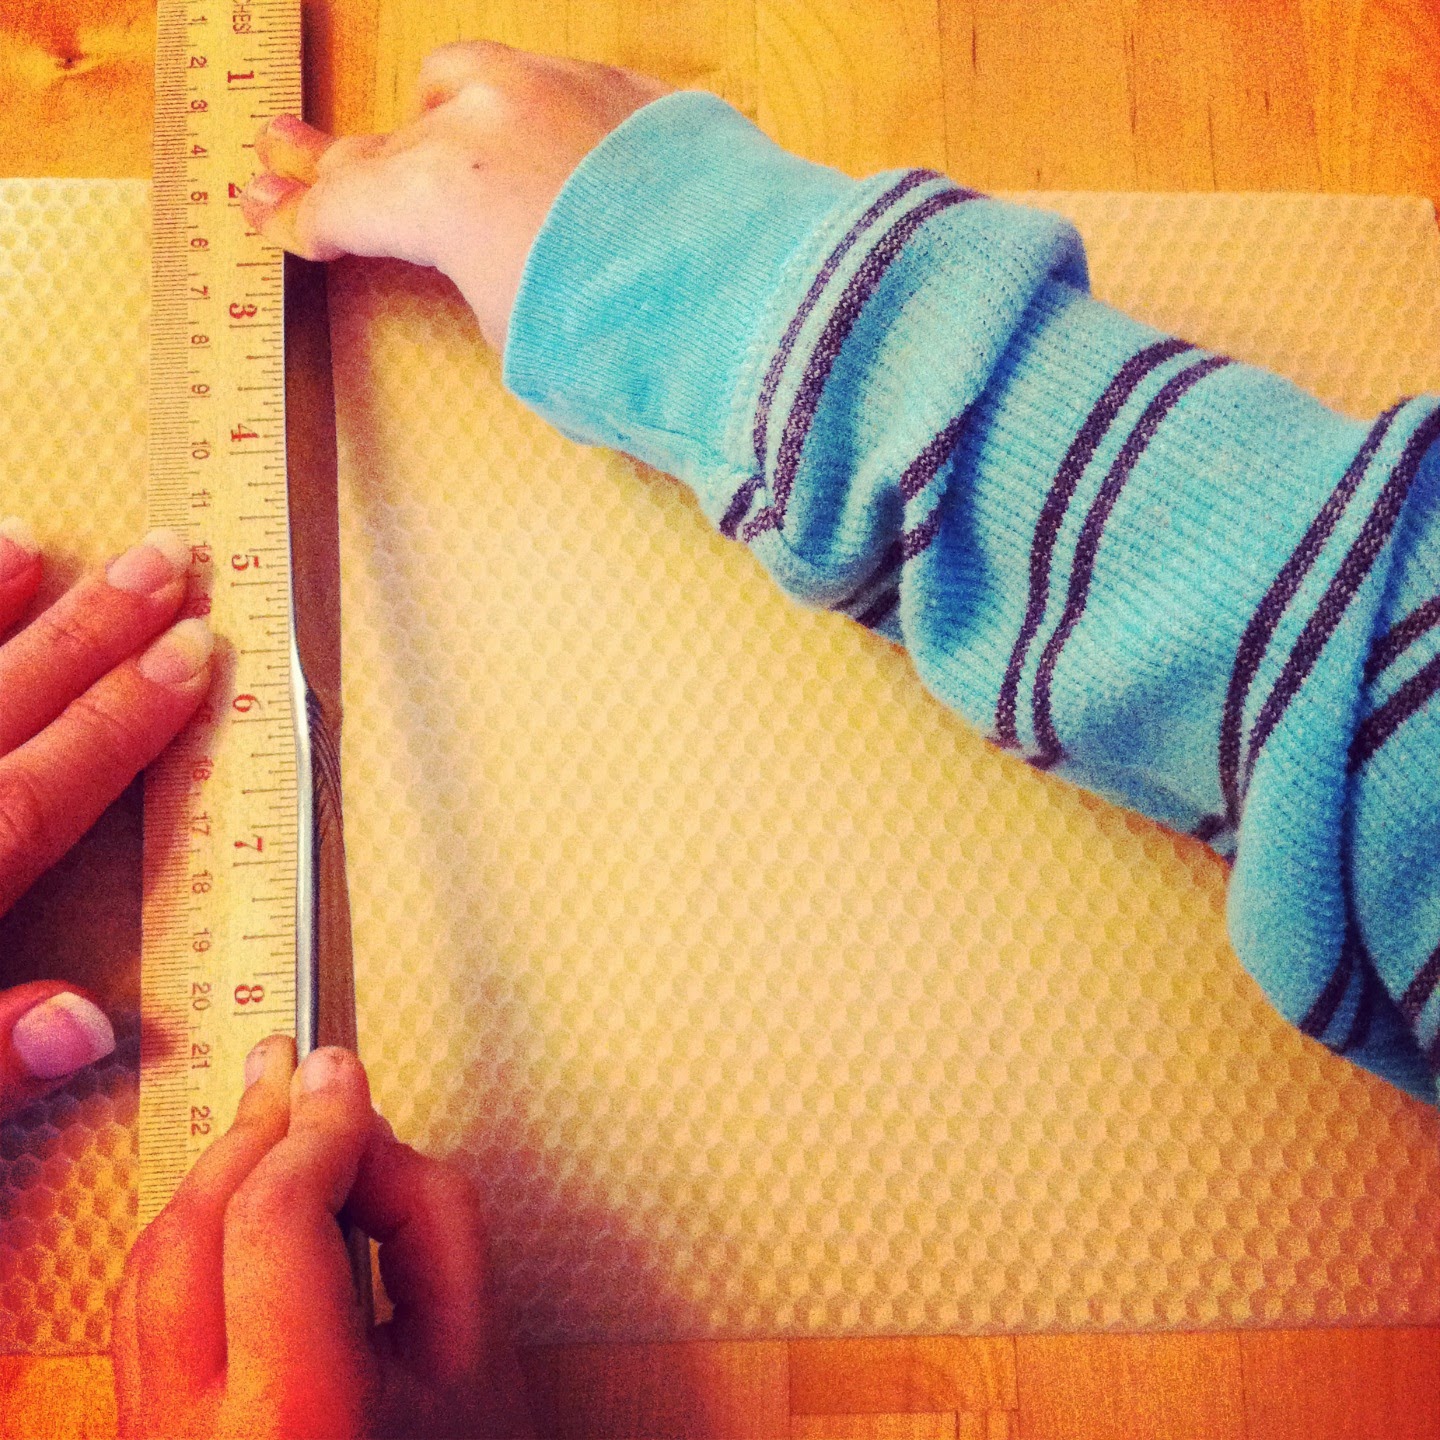
 We opted for two tapers per sheet, 
so we measured it and found the halfway point,
scoring with a butter knife at the top and bottom edges.


 Using our marks at the top and bottom,
we used a straight edge to score a complete line.
No need to saw, just press it into the wax.
Then, pick up the wax sheet and bend it.
It will break into two pieces.


 Lay the wick along the edge and trim to size.


 Press the wick along the edge to keep it in place.
Curl up the edge so that it covers the wick.
Then, roll, roll, roll.


 Press the seam from top to bottom to seal it.


I just love them!  Thanks, Linus <3

Wednesday, January 1, 2014

To You!

Happy New Year, friends near & far!

I am ever-so-grateful for the gifts you have given me. 

I carry them in my pockets, and I smile when I come across them --

(though they do get a little smudgy next to old tissues and wrappers and rocks I'm asked to hold on to).

They remind me of you -- and how fortunate I truly am.

Thank You.

And now I'm off to watch It's a Wonderful Life.  Because it really is.

Sunday, December 22, 2013

Sunday, January 13, 2013

Let it snow, let it snow, let it snow!


Christmas is over, but it's still winter!
And, there are still some Christmas baubles in stores, at greatly reduced prices -- will you be out and about this weekend to pick up a couple?
Or, you probably have something just-perfect around your house.

How to Make a Swirling Snowstorm
1.  Find a (used) jar with lid and cute-something that fits nicely inside.
2.  Test the jar and lid to make sure they are water-tight.
3.  Glue your cute-something to the inside of the lid with a water resistant glue & let it dry. (Our "tool drawer" had a variety of good options.)
4.  Fill 1/3 of the jar with glycerine (available at Rite Aid, CVS, any pharmacy).
5.  Add some glitter -- you don't need a whole lot (we discovered this the hard way...).  Stir.
6.  Fill with water.  You want to have as little air as possible in your snowglobe, so experiment with putting the lid/figure on and off as you add water.
7.  Put glue on the inside edge of your lid and screw it onto the jar.
7.  Add a decorative ribbon or edging to the lid.

made with the help of Dawn and Jane Bull

Thursday, March 8, 2012

"Winter"


It's never felt quite right --  rounding up winter (read "snowy winter") books every year.  I just figured out why:  Because we only see snow when it's nearly spring!  Because in spring, plans to drive to the snow don't get cancelled due to a storm, we don't have to think about putting chains on the tires, and everyone will stay warm.  And that's when all those snow-blanketed stories make sense to us! 

So after a snowy March weekend of lively sledding, creative Snowmama & Baby building, industrious fort constructing, mischevious snowball throwing, boisterous game playing by the fire with friends, we came home to enjoy some new favorites (for us!).  Viva "Winter!"


Did I mention "snow eating?"

...and snow break-taking?

Snowballs by Lois Ehlert
Snow on Snow on Snow by Cheryl Chapman
Dream Snow by Eric Carle
Stella, Queen of the Snow by Marie-Louise Gay
Poppleton in Winter by Cynthia Rylant
The Mitten by Jan Brett
The Three Snow Bears by Jan Brett
The Hat by Jan Brett
Copy Me, Copycub by Richard Edwards
The Winter Visitors by Karel Hayes
Snow Amazing: Cool Facts and Warm Tales by Drake & Love

The mudroom (heart, heart)


Monday, November 28, 2011

Hot Cocoa to Warm Chilly Hands


New Mexican Hot Chocolate
5 Tbsp powdered, unsweetened cocoa
1/2 tsp ground cinnamon
1/8 tsp ground nutmeg
pinch of salt
1/3 cup honey
1/2 cup hot water
4 cups whole milk
1 tsp vanilla

1. Combine the cocoa, cinnamon, nutmeg, salt and honey in a saucepan and mix well.  Stir in the hot water.
2. Stir over medium-high heat until it begins to boil.  Turn down heat immediately and simmer and stir for 30 seconds.
3. Add milk and stir constantly over medium heat for 1 to 2 minutes.  Don't let it boil.
4. Remove from heat and stir in vanilla.  Use a wire whisk or rotary beater to make it frothy.

From Josefina Just For Fun

Wednesday, November 23, 2011

Cranberry Wreaths

When you make your cranberry sauce this year,
save a few berries for these pretty little wreaths.
We found them on maya*made.   


These are all the supplies you need (floral wire found at Michael's, ribbon, fresh cranberries & scissors) 
Wire cutters make the project even easier.

Linus did a little stringing, too -- but mostly he sampled the berries.


We may take this to our Thanksgiving dinner tomorrow -- it's easy enough for all ages, you can spend as long or as little time at it as you like, people can come and go, and if you end up with a lot of them they can be festively hung on trees outside for your outdoor friends!

Thursday, April 28, 2011

Snow Day!

 Sela has been begging to go to the snow for several seasons now.  We finally got it together this year to give it a try.  To be honest... I didn't have high hopes for our day.  Boy, was I wrong!  It was a truly wonderful day of family fun.


We all loved the sledding.  It was beautiful day.  And, it even snowed on us several times.
And I'll make a plug here for doing things simply. 
We borrowed most of the snow clothes and gear from generous friends.  We didn't wake up early.  We didn't have a definitive plan for where we were going.  And while I packed bags of warm clothes, Daddy packed a lunch out of whatever we had. 
And it was great!
I'm learning...


None of our family outings are complete without a "car picnic."


We all left happy : )